Making a holiday feast that satisfies everyone’s dietary needs can be challenging. But it doesn’t have to be! We’ve searched the internet for the best Thanksgiving Meal Plans for everyone, including plans for Vegan, Vegetarian, Gluten-Free, Sugar-Free and Dairy-Free.
Don’t forget dessert! We’ve also included our favorite picks for Sugar-Free and Vegan desserts to make the holiday meal complete.
Disclaimer: This post is not sponsored in any way and based on personal opinion. Here at Edible Ink, we want to help make your holidays as best (and simple) as they can be, with no strings attached!
Mel at A Virtual Vegan goes above and beyond with her Vegan Thanksgiving Dinner Menu, including a shopping list to make preparations for the big day a breeze! Plus a timeline to make cooking a full feast manageable. Dishes include:
No doubt, large gatherings have been a rare occurrence this year. If your holidays are less grand feasts and more intimate dinners for two, the Vegan Thanksgiving Dinner for 2 may be your ideal menu. Set up as a “choose your own adventure’ of a menu complete with cooking tips, this meal plan is great for small gatherings, or just you and your significant other. Dishes include:
Packed full of gluten-free Thanksgiving options, this Easy, Gluten-free Thanksgiving Menu satisfies every celiac’s holiday food cravings! Here, turkey is still on the menu, with modifications to cornbread, biscuits and gravy. Dishes include:
Vegetarian food blogger Cookie and Kate provides a list of 33 Vegetarian Thanksgiving Recipes to make your own meat-less feast. No need for Tofurkey with delicious, whole food dishes like:
Nothing makes a lactose intolerant person happier than a big bowl of dairy free mashed potatoes! This list from Cook Nourish Bliss includes a slew of dairy free classic Thanksgiving sides, as well as a few dairy free Thanksgiving desserts. Dishes include:
How about a super simple Thanksgiving Menu this year? Instead of roasting the whole turkey, try a juicy Turkey Breast from A Head of Thyme. More recipes include:
Easy, vegan, and for some, gluten free! This list of 28 Easy Vegan Thanksgiving Desserts is sure to have something for everyone. So go ahead, make two! Recipes include:
What are your Thanksgiving plans this year? Are you using any of the meal plans listed here to craft your ultimate Thanksgiving feast? Let us know in the comments below! Like, share and subscribe and don’t forget to tag Edible Ink!
Oh yes. Today we’re making the traditional Brazilian staple: pão de queijo. Literally translated, it means “bread of cheese” and really, that’s a great description. Soft, fluffy small rounds of cheesy goodness. Let’s get started!
Simply put, pão de queijo is a small cheese puff bread. It’s typically served with most meals in Brazil and eaten for breakfast.
There’s no exact written history of pão, of course, but it’s believed that, around 1700, women who were enslaved typically made pão de queijo for farmers (don’t forget, Brazil was a Portuguese colony before it gained independence in 1822).
Pão de quiejo become a staple of Brazilian cuisine since, growing in popularity. You can now even find frozen versions of pão available in big stores like Costco.
One of the more distinguishing features of pão de queijo is it’s flour — commonly known to us in the US as tapioca starch. Wheat crops didn’t grow well in the northern region of Brazil, where warm weather made growing the grain difficult. Instead, ground, dried cassava root was used in place of flour.
Cassava root aka tapioca starch
Cassava is an incredibly drought-tolerant plant, making it a favorite crop of warmer, tropical regions. In the United States, cassava is also called:
Yuca
Manioc
Brazilian arrowroot
Cassava root is made into cassava flour, which is also called tapioca starch. These alternative names are useful to know when you are shopping for the ingredients to make your very own pão de queijo!
Cassava flour possesses a unique, almost gelatinous quality when baked. Combined with the melted cheese, the pão de queijo becomes impossibly soft, fluffy and chewy!
Once we got the hang of it, we made pão de quiejo en masse
Tried and tested Pão de Queijo recipe
Let’s get personal for a moment. My dad’s side of the family is very familiar with Brazil and its cuisine. In fact, he lived there with my grandparents during his teenage years. So, it was a natural place for a family reunion.
In 2017, we all went down to Brazil! That’s where I tried pão de queijo for the first time, along with my husband and my parents. Brazil has incredible food, including mousse de maracujá (passion fruit mousse) and of course, the Churrascuria (Brazilian barbecue).
When we returned home, we began testing recipes to replicate the impossibly perfect pão de queijo we had in Brazil. Seriously, it seemed no matter where we went, it was perfect every time!
While we didn’t have access to the specific cheese typically used to make pão (meia cura/minas cheese), we found this substitute combination works beautifully! The sharp saltiness of the parmesan balances well with the mild, gooeyness (yes its a word) of the mozzarella.
For best results, buy the cheese whole and grate it yourself. Pre-shredded cheese sometimes gives off a chalky flavor.
Another non-traditional note: while pão de queijo is typically formed and placed in rounds on a baking sheet, I found it easier to place the dough inside mini muffin tins. The tins helped the pão hold their shape, and made the shaping process much faster than if we were to shape them by hand. Not traditional, no, but effective? Yes.
Enjoy!
Pão de Queijo
Lauren Harvey
A traditional Brazilian bread, pão de queijo is easy to make with this straightforward recipe. Parmesan and Mozzarella replace authentic Brazilian cheese that is difficult to find in the United States. The result is a delicious, chewy, puffed cheese bread!
If you purchased pre-grated cheese, skip to next step. Grate the parmesan and shred the mozzarella. After measuring out the required amount, you can mix the cheeses together in a bowl and set aside.
Preheat oven to 400°F.
Set up your stand mixer so that it's ready to go for the next step. Add the tapioca flour and baking powder to the bowl of the mixer.
In a medium-sized saucepan, combine the wet ingredients (milk, water, oil and salt). Cover and bring to a gentle rolling boil over medium heat. Once boiling, pour over the flour in the mixer.
Turn on the mixer and mix on high until the tapioca flour and wet ingredients are well-incorporated. It will have a stretchy, sticky texture that is to be expected.
Add eggs one at a time. To make things easy, you can crack the two eggs into a small bowl and whisky gently. Pour this in a slow steady stream into the mixer on medium-high speed. Allow the eggs to incorporate in small increments before adding more.
Repeat a similar process with the cheese. Working in small batches, add the cheese into the batter slowly until fully combined.
Spray your mini muffin tin with non-stick spray. Using a small scoop or spoon, scoop the batter into the muffin wells.
This is an easy, hearty bread recipe, made with a packet of yeast and a dash of whole wheat flour that requires very little kneading, fussing or attention.
This is not a fluffy, Wonder bread recipe. This bread has density and a heartiness that makes for a great breakfast toast or soup companion. Slice thin for best results. The wheat flour adds a heftiness that makes it extra filling and flavorful compared to a fluffy white bread.
Serving suggestion: Toasted with fresh herbs and veggies!
No sourdough needed
In March 2020, in lieu of my newfound work from home position amidst COVID lockdown, I fulfilled my dream of having my very own sourdough starter. Months later, after a tumultuous string of events that ultimately led to the decision to move, I decided it was time to let my starter go. After all, it hadn’t been bubbling for weeks and was producing a strange grey liquid on top that smelled a bit like toe jam.
And so there I was, having passed into and out of the sourdough starter phase of quarantine 2020. Thankfully, I am persistent upon purchasing yeast packets whenever I see them, particularly when grocery store stocks began dwindling and the shelves looked more and more bare with each visit.
Cooler months are coming, and while grocery shelves may be stocked, it’s still nice to enjoy a loaf of homemade bread on the weekend. Bonus: your house will smell like fresh baked bread for days!
Bread in bed.
Fully rested and shaped loaf ready for the oven.
Fresh baked loaf!
Homemade bread for the rest of us
I love freshly baked, homemade bread. What I don’t love is spending countless hours preparing it only to have it come out subpar. That’s why this is my go-to homemade bread recipe. It’s simple, straightforward and comes out great every time.
If you are new to making bread, here’s a video of me kneading the dough by hand. You can watch it before you begin the recipe, or while you are kneading the dough. Let’s make bread together!
Easy Hearty White Wheat Bread
Lauren Harvey
This bread is made to fill you up! Read the full recipe, including tips and notes about mix-ins before beginning. We suggest making it as is for your first try, and experimenting with mix-ins as you feel comfortable. Enjoy!
Bench knife, lame or razor blade for scoring the loaf
Ingredients
1 ½cupwarm water
1 tbsphoney
1 ½tspsalt
1tbspActive Dry Yeast or Instant Yeast
3cupsall-purpose flour
1 cupwhole wheat flouror additional 1 cup of all-purpose flour
Instructions
Add water, honey, salt, and yeast to a glass bowl. Whisk gently to combine. Let sit 3-5 minutes until bubbles appear on the top of the liquid.
Add the all-purpose and wheat flours to the bowl with the yeast. Incorporate using a spatula until dough becomes shaggy, then you can use your hands. Remember to scrape the bottom of the bowl to fully incorporate flour. Once all flour is incorporated and the dough has come together in a bowl, turn out onto a lightly floured wooden board or clean, flat surface. Knead using the heel of your hand until dough is smooth and not sticky.
Heat the oven to 400°F. Turning the oven on now allows plenty of time for it to come fully up to temperature before baking the bread.Place the round dough on the wooden board. Cover gently with a clean flour sack towel or dish towel and allow it to rise for 30-45 minutes.
Using a paper towel, lightly rub the inside of the pan with olive oil.This step is to ensure that nothing will stick. I do it even with nonstick pans. Better safe than stuck!Cut a strip of parchment to fit long-ways in the loaf pan with some excess over the sides. This will make it easy to lift the loaf out of the pan once its done baking.
Gently roll the dough back and forth to make a log shape approximately the same size as your loaf pan. It shouldn't take much to get it into shape.Place dough into loaf pan and, using a bench knife, lame or razor blade, score lightly down the middle.
Bake for 30-40 minutes.You are looking for a nice golden outside and a hollow sound when you knock on the bread.Leave on a cooling rack for an hour or so before slicing for a clean cut and to ensure its finished the cooking process.
Notes
Tip: Check for doneness by tapping the bottom of the bread. If it sounds hollow, the bread is finished cooking.Mix-in IdeasAdd any spices, seasonings or mix-ins you’d like. Try adding sliced olives, patted dry, Italian seasoning or a sprinkle of your favorite cheese! Add mix-ins after dough is kneaded, but before it is shaped and rested.Some ideas to get you started:
Kalamata Olives, patted dry
Parmesan, with pesto brushed on top just before baking and a sprinkle of flaky salt.
Sunflower seeds, soaked in water for 30 min and drained dry before baking.
Caramelized onions and blue cheese.
Sun-dried tomatoes.
Keyword Easy Bread Recipe, White Wheat Bread, Yeast Bread Recipe
Have you made bread at home? How did you like it? Rate this recipe and leave me a comment below!
These marbled cupcakes are sure to impress — no mixer required! Make the separate orange and espresso batters then swirl in the cupcake tins to create the gorgeous marbled effect. Top with the orange espresso buttercream for the perfect treat for the adventurous dessert fanatic in your life — or you know, just to have around as a quick snack!
To best preserve the individual flavors, I’ve created two separate cake batters for these cupcakes; the orange and the espresso. The two are then playfully layered into cupcake tins and baked.
In order to keep this as simple as possible, no mixer is involved for the creation of the cake. Get two large bowls side by side and make your batter at the same time.
The recipe may look intimidating but I promise you can do it! As always, feel free to contact me with any questions.
The cake recipe is DAIRY FREE! No milk or butter used in the making of the cake. For a simple dairy-free swap in the buttercream, follow these replacements:
Use dairy-free or vegan butter.
Instead of heavy cream, use 2 tablespoons of your favorite dairy free milk, vanilla coffee creamer, or coconut cream.
Orange and Espresso: Delicious Flavor Combination
Initially, perhaps, this flavor combination seems counterintuitive. After all, chasing orange juice with espresso is a bitter experience. However, when layered with sugar in fluffy cupcake form, these flavors complement each other beautifully.
After much recipe testing, I perfected the amount of orange and espresso in each batter so that their true flavors come through but do not overpower one another. Additionally, these cupcakes are sweet which helps blend the two flavors together in a delicious way!
The espresso batter includes a dash of cocoa powder. This helps to round out the deep, bitter flavor of the espresso and complements the fresh orange zest and juice in the orange batter.
The buttercream frosting is a key component of this dessert, really tying the orange and espresso together in a smooth, creamy finish. I highly recommend taking the time to make the buttercream.
If you MUST skip the process of making the frosting, go for a vanilla store-bought, and mix in the orange zest, orange flavor and instant espresso as directed in the buttercream recipe.
The end result of the marbling technique before frosting.
Orange and Espresso: Special Ingredients
To truly bring out the orange and espresso flavor in these cupcakes, we enlist the help of some special ingredients.
For the orange batter, use fresh, ripe oranges. You’ll zest and juice these oranges to use in the batter, and reserve some zest for use in the buttercream frosting.
In the espresso cupcakes, I chose to use instant espresso. It’s a great ingredient to have on hand for baking, as you can use it in the plain powdered form to incorporate into other cakes, frosting, ice cream or cookies or use the powder to brew just as much espresso as you need for your recipe. Here’s a link to my favorite brand of instant espresso, pictured below.
Marbled Cupcake Technique
What makes these cupcakes so fun and pretty to look at is the marbling technique. The natural colors of the orange and espresso come through in each batter, so you wind up with one light orange batter and a nice tan batter for the espresso. By making the batters separately and marbling them in the cupcake tin, it results in a gorgeous marbled cupcake!
Cake Mix in Two Separate Bowls. Layer and Swirl with Toothpick!
How you marble and layer the separate cake batters is entirely up to you. There truly is no wrong way to do this. Use small spoons to scoop different layers into the cupcake tin, then use a toothpick to swirl the colors together. For a more hands-on tutorial, check out this video from Wilton. The recipe they use utilizes food coloring, which you don’t need when using this recipe. However, its a good video of how the marbling process actually looks and may help if you are feeling unsure about the process.
Marbled Orange Espresso Cupcakes
These marbled cupcakes are sure to impress! To keep this recipe as streamlined as possible, I've laid out step-by-step instructions. You'll be making the espresso and orange batters separately, then marbling them together in the cupcake molds. Lastly, while the cupcakes are baking, prepare the buttercream (if desired, or use store bought).
Stir 2 teaspoons instant espresso into warm water until fully dissolved. Set aside.
In a clean bowl, sift flour, baking powder and cocoa powder. Add in the salt and sugar and ½ teaspoon instant espresso. Whisk gently to combine.
In a different clean bowl, add the egg, oil, vanilla and espresso. Whisk to combine.
Pour the dry ingredients into the wet ingredients. Whisk well to combine. Set aside until ready to use. If you prefer, you can pop this bowl into the fridge while you prepare the orange cake batter.
Orange Cake Batter
Zest two oranges into a small bowl, avoiding the white pith. In a separate small bowl or cup, juice both oranges.
In a clean bowl, combine the flour, baking powder, sugar and salt. Whisk gently to combine.
In a separate clean bowl, add the egg, oil, vanilla, orange juice, orange zest and orange emulsion. Whisk to combine.
Pour the dry ingredients into the wet ingredients and whisk well to combine.
Marbling the Cupcakes
Preheat the oven to 325°F.
Using paper or silicone liners, line one full-size cupcake pan.
Using two small spoons, scoop a bit of orange batter into the bottom of the cupcake tins, then add some espresso, alternating however you'd like. This is the fun part! Get creative and layer however you'd like. Stop filling the cups when it reaches halfway.
Using a toothpick, swirl the batters together in fun and interesting patterns. There's really no wrong way to do this, so have fun with it and experiment freely.
Bake at 325°F for 20-25 minutes or until the tops are firm and a toothpick inserted into the middle of a cupcake comes out clean.
Prepare the Buttercream
Using a stand or hand mixer, beat the butter until it is soft and fluffy about 5-7 minutes. Using room temperature butter will help speed up this process.
Incorporate powdered sugar ½ cup at a time, waiting until fully combined before adding more.
Once all the powdered sugar is mixed in, add the salt and vanilla extract. At this point, scrape down the sides of the bowl to make sure everything is fully combined.
Pour the whipping cream in a slow, steady stream while beating the buttercream.
If you prefer your buttercream to be plain vanilla flavor, you can skip this step. To get the full orange espresso flavor, add the espresso powder, orange zest and orange emulsions, mixing until fully combined.
If you don't have a piping bag, you can cut one corner off a Ziploc bag and use it to pipe, or simply spread the frosting onto the cupcakes with a butter knife.
Once the cupcakes have cooled fully, frost your cupcakes however you'd like. Incorporate some food dye into the buttercream for an extra burst of color!
Originating in Provence, France, pissadelière is a pizza-like street food. Located on the southeastern side of France, Provence borders Italy and the Mediterranean Sea — the perfect mix of culinary influence to create this French pizza!
Gorgeous Provence
Traditionally, pissadelière is topped with onions, anchovies and olives. Needless to say, this is NOT a traditional pissadelière.
Instead, I chose to use the pissadelière dough as a base for a fruity, cheesy, sweet flatbread, something that could easily be eaten for dessert or for breakfast. This Nectarine Goat Cheese Pissadelière would make a great addition to a Sunday brunch, as an afternoon snack with a cup of tea or coffee or a sweet and savory dessert component for your next dinner.
A platter of Nectarine Goat Cheese Pissadelière
The dough is the most laborious part of the recipe, and even then most of the time spent is letting the dough rise, not active time.
If you prefer to use a different stone fruit, the recipe is completely adaptable. Simple choose your fruit, cheese and herby toppings! Here are some other combinations to consider:
Plum and Chèvre
Peach and Gorgonzola
Berries and Brie
Slice in triangles for a fun, rustic platter of tasty sweet/savory pizza!
On a Personal Note
The basis of this recipe, originally fromCook’s Illustrated , was handed down to me from my mom, originally given to her by my grandfather. He was the one who taught me how to make pizza at six years old. He called the recipe “French pizza” because he (like many of us, I’m sure) was confused on how to properly pronounce “pissadelière”. Honestly, I have no idea how to say it either. What I do know is that the final result is delicious.
Nectarines, goat cheese, a drizzle of honey and a sprinkling of fresh herbs. Delicious!
The trick to the dough is using well-oiled hands! As my grandpa (Papa) said, “The dough is beautiful to work with, especially in conjunction with the parchment paper and using very oily hands stretches the dough easily.”
It was a pleasure to make this recipe that he’d made and enjoyed before. I hope you enjoy the recipe as much as we did. Feel free to change out toppings as you see fit!
Nectarine Goat Cheese Pissadelière
This "french pizza" is made with a soft dough and topped with fresh nectarines, goat cheese, herbs and a drizzle of honey. Eat for dessert or breakfast!
1tablespoonolive oil, plus additional as needed for dough
1cup warm water
1-2large, ripe nectarines
8ouncessoft goat cheese
Handful of fresh herbsmint, thyme or basil
Honey, for drizzling
Instructions
In a large bowl, mix yeast and warm water. Whisk gently. Let bloom for 3-5 minutes. You should see light bubbling forming in the bowl.
Sift all-purpose flour into the bowl with the yeast and water.Add salt and olive oil. Mix in bowl until combined.Then, on a wooden board dusted with flour, knead dough into a smooth ball, about 3 minutes.When kneading, shape the dough into a ball and use the heel of your hand to push the dough down, reshaping it.*For an alternative method using a food processor, see recipe notes.
Lightly oil a clean bowl and place the dough ball inside and cover with a cloth. Allow to rise for 1 – 1 ½ hours, until the dough has grown in size
Have olive oil close at hand for stretching the dough. This dough responds better to oil than flour to repel stickiness.Line a full-sized baking sheet with parchment.Cut the ball of dough in half, forming two chunks.Stretch the dough using oiled hands to form rectangle shapes. (Any shape you make is okay, the important thing is stretching the dough so it is about ½” thick. If the shape doesn’t come out the way you’d like it, remember, it’s not a mistake – it’s rustic!)Place one rectangle on one end of the baking sheet. Using your fingertips, dimple the dough.Repeat with the other dough ball.
Slice the nectarines into eight sections. This prevents the nectarines from being too thin and burning in the oven. Top dough with sliced nectarines and goat cheese. Add as much or as little as you'd like!
Bake in a 425°F oven for 13-15 minutes. The crust should be lightly brown.
Drizzle the pissaladiére with honey. Top with finely chopped herbs of your choice.Mint, thyme and basil all pair well with nectarines and goat cheese. If your herbs are flowering, use the flowers too! They are edible, slightly sweet and make for a beautiful presentation.Slice the pissaladiére any way you’d like. If the dough is not perfectly rectangular, I recommend slicing into triangle shapes.
Notes
Alternative dough method: If you are new to dough making, you may be more comfortable with the food processor method described in the original Cook’s Illustrated recipe:“In the workbowl of a food processor fitted with a plastic dough blade, pulse flour, yeast and salt to combine, about five 1-second pulses. With machine running, slowly add oil, then water, through feed tube; continue to process until dough forms ball, about 15 seconds. Generously dust work surface with flour; using floured hands, transfer dough to work surface and knead lightly, shaping dough into ball.”
A buckle is similar to a cobbler, but instead of biscuit dough, a buckle uses a cake-like batter. Classic buckles include a crumbly topping, but to keep things simple, I decided to omit it from this recipe.
To learn more about the difference between a buckle and a cobbler, check this out.
Everyone has their own technique for a buckle, and this recipe uses mine.
I use an easy buttery batter, adapted from this recipe. The batter is poured in first, then skinned peaches tossed in brown sugar go on top.
This way, as the buckle bakes, the batter rises up around the peaches, soaking up all that delicious peach juice and making for the best, sturdiest slice. Serve with some vanilla bean ice cream to cool off the warm summer nights.
I buy my peaches (and a myriad of other stone fruit and berries) from the Okui Fruit Stand in Grover Beach.
I may be biased, but something about Okui fruit just stands out above the rest. That being said, the peaches I used in this recipe were huge, bigger than I could hold in one hand, and may be larger than the peaches you find in your local supermarket.
For this recipe, the bigger the better! If you can only find medium sized peaches, adjust the blanching time when you boil the peaches to peel them.
Decadent Peach Buckle
Cake batter and fresh peaches come together in this easy summer dessert!
Over high heat, bring a large pot of water to boil on the stove. Gently rinse the peaches and score an X on the bottom of each peach with a paring knife.
Once the water is boiling, carefully drop the peaches in and cover with a lid for 1-2 minutes, depending on the size of your peaches. Larger peaches will take longer than smaller peaches.
Remove from boiling water and place in a glass bowl in the sink. Run cool water over the peaches.
When they are cool to the touch, peel the skin off starting at the X mark. If ready, the peach skin should come right off, detaching from the peach evenly and easily. If the skin seems stuck, try boiling again for another minute.
Slice the peaches in half and remove the pit. Cut into quarters, then slice the quarters in half. This should give you sixteen peach cubes per peach.
Place all sliced peaches in a large bowl and set aside.
Prep the filling.
Preheat the oven to 350°F.
To the bowl with the sliced peaches, add ½ cup brown sugar. Stir to combine. Set aside while you prep the batter.
Prepare the batter.
Melt the butter using a microwave safe bowl in the microwave, using 15-30 second intervals to ensure the butter does not spill over. (If you don’t have a microwave, you can use a toaster oven or melt it in a small pot on the stove.)
In a clean bowl, mix the flour, sugar, baking powder, salt, and cinnamon.
Allow the butter to cool to the touch, so that it is still liquid but not too hot.
Once the butter is cool, add it to the bowl with the dry ingredients. Add the milk. Stir to incorporate well. Set aside.
Bake the buckle.
Grease a 9×13” baking pan
Pour the prepared batter into the pan, and smooth out to cover evenly.
Add the peaches on top of the batter. If your peaches are extra juicy, use a slotted spoon to scoop the peaches into the pan. This way, you will retain some of the juice but don’t have to use all of it.
Sprinkle sugar on top. Bake at 350 degrees for 35-40 minutes, until edges are beginning to brown and the batter in the middle of the cobbler is no longer runny.
Allow the buckle to cool before serving. This gives the batter time to soak up any juices left behind by the peaches in the baking process, making for an extra tasty buckle!
Serve with vanilla ice cream and a bit of whipped cream. Enjoy!
This recipe is an adaptation of the Banana Loaf recipe in Mary Berry’s Baking Bible. I’ve made a few minor adjustments, converting the self-raising flour to accommodate all-purpose flour instead. I’ve yet to come across self-raising flour on the supermarket shelves, and this bread comes out as cakey and light by making your own.
You’ll notice your bread looks dark golden on the outside. That’s good! This recipe comes out light, fluffy and cakey on the inside, unlike any other banana bread I’ve tried before. In fact, that’s why I’m sharing it — this is my go-to recipe and its the only one you’ll ever need!
I tend to add a couple of generous handfuls of chocolate chips to the batter before pouring it into the pan. It makes for a great dessert, or toast a slice with some butter for a scrumptious breakfast.
Mary Berry’s original recipe calls for 4 oz of softened butter. I use half butter and half canola (vegetable) oil because I prefer the fluffier texture you get from using some oil alongside the butter. Make sure your butter is about room temperature, this will ensure it blends easily in with the rest of the ingredients. Melting the butter to a complete liquid state may affect the texture of the cake of the cake negatively.
I make this recipe by weight, but have included volume measurements as well if you don’t have a kitchen scale (though I recommend it!).
Ultimate Banana Bread
Light, fluffy, cakey version of the classic dense banana bread. Add chocolate chips for some extra enjoyment!
Preheat the oven to 350° F. Line a loaf tin with parchment.
Measure all ingredients into a mixing bowl and beat with a stand or hand mixer for about two minutes, until well-blended. Mix in ½ cup mini semi-sweet chocolate chips, if desired. Spoon the mixture into the prepared tin and level the surface.
Bake in the oven for about one hour, until well-risen and golden brown. a fine skewer inserted into the center should come out clean. Leave the tin to cool for a few minutes, then turn out onto a cooling rack before slicing and serving.
Notes
Recipe adapted from Mary Berry’s Baking Bible.
INGREDIENTS
2 oz softened butter
2 oz canola oil
6 oz granulated sugar
2 large eggs
2 ripe bananas mashed
225 g AP flour
1 TB baking powder
pinch of salt
DIRECTIONS
1. Preheat the oven to 350 degrees. Line a loaf tin with parchment.
2. Measure all ingredients into a mixing bowl and beat with a stand or hand mixer for about two minutes, until well blended. Mix in 1/2 cup mini semisweet chocolate chips if desired. Spoon the mixture into the prepared tin and level the surface.
3. Bake in the oven for about one hour, until well-risen and golden brown. A fine skewer inserted in the center should come out clean. Leave the tin to cool for a few minutes, then turn out to slice and serve.
For the answer to this question, I consulted the experts over at Farmers Almanac. Turns out I’d been calling my crisp a crumble all this time!
The main difference: Cobbler uses a pie crust or dropped biscuit dough on top of the fruit, while a crisp use a streusel topping, typically some combination of oats, flour, butter and sugar. Crumbles are similar to crisps, minus the oats in the topping. Now you know!
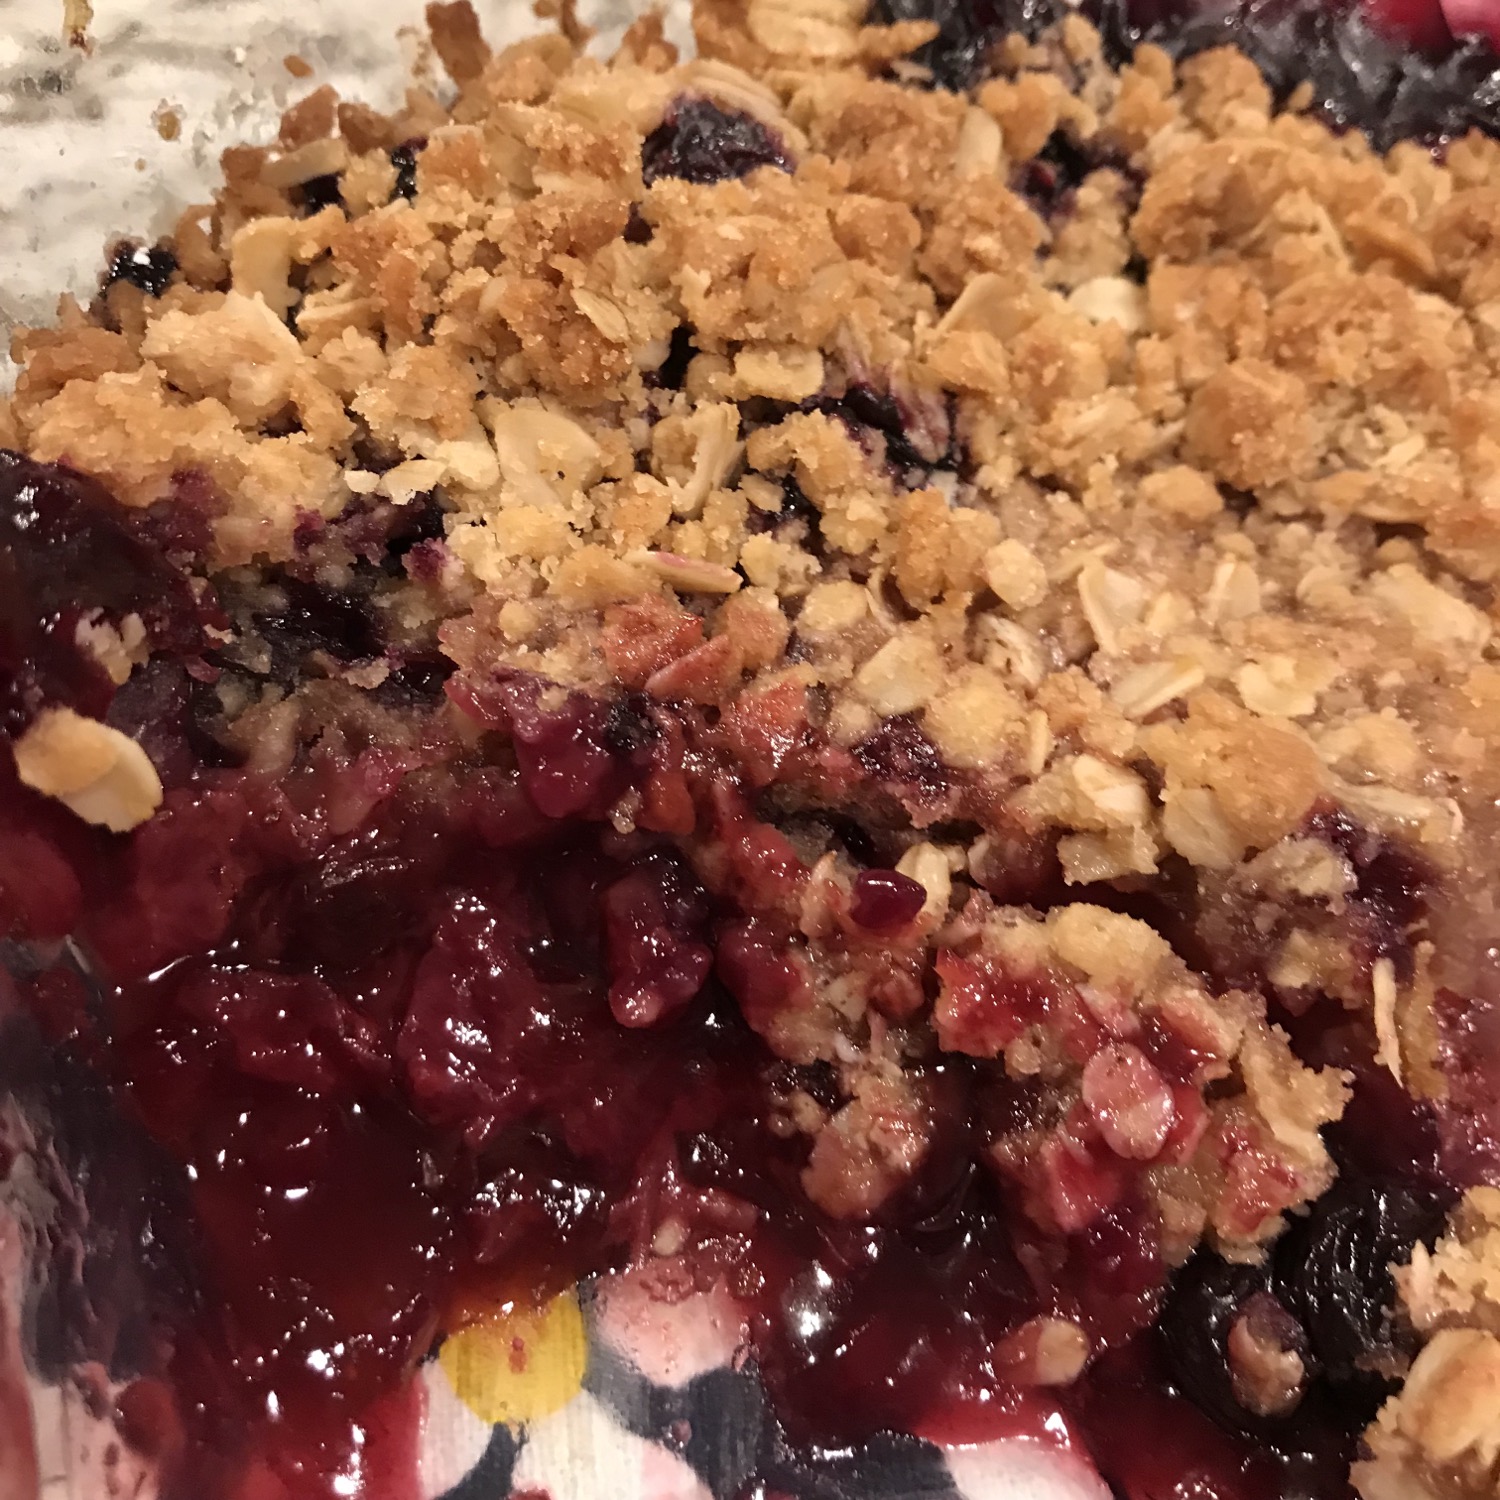
While it’s not the prettiest dessert, it’s no doubt one of the tastiest.
A Dessert for Any Fruit
This on-the-fly fruit crisp is my go-to when I need dessert STAT. If using berries, you can throw this crumble together in 10 minutes flat. Bring it to a potluck, or let it bake while dinner is cooking! It’s a foolproof recipe that relies heavily on ingredients already in your pantry. No mixer required!
This crisp is also a great way to use up fruit that is right on the edge of turning bad. Even berries or stone fruit that are a little too soft to eat cook up nicely in the crisp.
I’ve made this crisp with various combinations of blueberries, apricots, strawberries and blackberries. I even tried it with only strawberries (super delicious). The point being, as long as your measurements are the same as the recipe, it will be great!
Choose your favorite combination of berries and/or stone fruits. Go with what’s in season, or what looks best at the market. That’s the true secret to a good crisp!
Bring It All Together
No one wants a crisp that’s turned to juice. This recipe requires quite a bit of corn starch, which helps to bind all the juices together as they cook out of the fruit.
Lemon juice & zest provide a contrast in flavor, and also help to draw out those juices! The topping crisps up nicely and also absorbs some moisture, resulting in a perfectly sweet, tart, crunchy, jammy crumble every time.
Sweet, jammy, with just a hint of lemon — perfection!
Berry Stone Fruit Crisp
Delicious, simple, comes together quick. This dessert checks all the boxes! Feel free to substitute in whatever fruit you have on hand — just stay away from citrus.
2lbfruit Fresh strawberries, blackberries, blueberries; stone fruit like peaches, nectarines, apples; whatever fruit you'd like!
1cupgranulated sugar
½cupcorn starchThis amount is appropriate for very juicy berries and fruit. If your fruit is not as juicy, you may not need as much, but it won't hurt to add it anyways.
2tsppumpkin pie spiceSubstitute: 1 tsp cinnamon, ½ tsp nutmeg, ½ tsp allspice.
1tspvanilla extract
2tsplemon juice
zest of one lemonAbout 1 teaspoon
For the Topping
1¼cupall-purpose flour
1¼cuprolled oats
½cupbrown sugar
½cupunsalted butterEquivalent to one stick
Instructions
Wash the fruit. If needed, trim and slice. The fruit will cook down in the oven, but bite-sized pieces are recommended.
Heat the oven to 350°F. Pull butter out of the fridge and let come to room temperature on the counter while preparing the rest of the crumble.
Using an 8"x8" baking dish, add the fruit. Measure vanilla extract, lemon juice, and lemon zest directly into the baking dish with fruit. Stir to combine.
In a clean bowl, add sugar, corn starch, and pumpkin pie spice. Whisk to combine.
Pour sugar and corn starch mixture over the fruit in the baking dish and mix well. You can use a spatula but I prefer to use my hands. Set aside.
Cut the softened butter into small, manageable chunks using a knife or bench knife. Place in a clean bowl. Add in the flour, oats, and brown sugar. Mix to combine, coating the butter with the dry ingredients and breaking it down into pea-sized pieces. You can use a pastry cutter to do this, which works best. Alternatively, try a hand-held potato masher or just your hands.
Sprinkled the topping evenly onto the fruit in the baking dish.
Bake about 45-55 minutes, until the fruit is bubbling and sticky and the topping is golden brown.
Let the crisp stand for 15-20 minutes before serving. This allows the juices to cool and thicken thanks to the corn starch. Serve with vanilla ice cream.
Keyword berry dessert, dessert in under 30 minutes, easy baking recipe, easy dessert, easy dessert recipe, fruit crisp, stone fruit dessert
It’s peak peach season! Optimal time to make this ultra-moist sweet peach cake. Ripe fresh peaches are quickly blanched, skinned, then sautéed in brown butter and sugar. A whole peach is chopped and folded into the batter, for double peach delight!
There’s a secret ingredient in this cake. Don’t be afraid!
I discovered a traditional Brazilian treat, cornmeal cake, a sweet cake often served with coffee. That is the base of this peach cake, loosely adapted from this recipe here. The cornmeal in the cake base lends texture and a subtle flavor that contrasts the sweetness of the peaches quite nicely.
The cake is baked, then set to cool in the fridge. While the cake bakes, the peaches are prepared on the stovetop. Once the cake is cool, the peaches are layered on top in whatever pattern or arrangement suits your fancy. The cake adorned with peaches is then set back in the fridge for an hour, where the buttery sugary juices of the peaches slowly seep into the crumb of the cake, creating that delectable moisture and permeating peach flavor.
Use a 9″ round cake pan for this recipe. You can make this for a party with friends, or just for yourself. It keeps extremely well and even holds up when left out on the counter overnight.
For gluten free and dairy free alternatives to the original recipe, scroll down to the recipe notes. A few simple substitutions turn this cake into a gluten and/or dairy free delight!
INGREDIENTS
For the Cake
Wet Ingredients:
2 eggs.
1/4 cup canola oil.
1/2 cup milk.
1/4 tsp vanilla extract.
Dry Ingredients:
1 cup granulated sugar.
1/2 cup regular cornmeal (not coarse).
1/2 cup all-purpose flour.
1/2 tablespoon baking powder.
Pinch salt.
For the Peaches:
Five ripe peaches, washed clean and patted dry.
1/4 cup unsalted butter.
3 tablespoon granulated sugar.
DIRECTIONS
Heat the oven to 325. Line a 9″ round cake pan with parchment on the bottom.
Bring a large pot of water to a boil. As soon as the water boils, prep an ice bath in a separate pot by adding lots of ice and cold water. Fill the pot about halfway (enough to cover all five peaches). Score the bottom of the peaches with a small X. Using a pair of tongs, drop the peaches into the boiling water for about one minute.
Remove peaches from boiling water using tongs and add directly into ice bath. Wait about 5 minutes. Remove peaches from water and set out to dry. Remove the skin from one peach by gently pushing away at the X mark. Dice the skinned peach and set aside. Leave the four remaining peaches until a later time.
In a large clean bowl, add all dry ingredients. Sift in baking powder and flour. Whisk together to combine.
In a medium-sized clean bowl, add all wet ingredients. Whisk vigorously by hand to combine. Bubbles should appear on the surface.
Pour the wet ingredients into the bowl with the dry ingredients. Whisk vigorously by hand to combine. Batter should be smooth.
Add the one chopped peach to the batter. Fold in with a spatula.
Pour batter into cake pan. Bake in oven for about 35 minutes. (Baking times vary. Check cake at 30 minute mark. Insert toothpick. If toothpick comes out clean, cake is done. If not, leave in for another five minutes. The top will brown considerably, as there is a large amount of sugar in the cake.)
While the cake is baking, prepare the peaches. Skin the remaining four peaches and slice into about 1/4″ thickness. Keep the slices nice and uniform, as these will be going on top of the cake.
In a large sauté pan, add 4 tablespoons butter. Let melt. When it begins to bubble and emits a nutty aroma, add sugar. Stir to combine. Then add peaches in a single layer.
Let peaches cook for about 5-7 minutes over medium heat. They should be soft and caramelized but not falling apart. Remove from pan and set aside (I like to use a pyrex for this). Place in refrigerator until ready to use.
When cake is finished cooking in oven, turn out onto cooling rack. Let cool in refrigerator for about 30 minutes. Remove from fridge and level the cake, using a large serrated bread knife to even out the surface of the cake. The easiest way to do this is to place the knife level, then gently cut across.
Arrange peaches in a circular pattern, working from the outside in. Use the best-looking slices of peach first, then fill in the gaps with the smaller slices. Set in fridge for about an hour. This will allow the juices from the peach to absorb into the cake.
Slice and serve! Whipped cream optional.
RECIPE NOTES
TO MAKE GLUTEN FREE: Replace flour with Gluten Free AP Flour. Available from Bob’s Red Mill, King Arthur or Trader Joe’s! To be safe, ensure the cornmeal package you use says Gluten Free. Cornmeal, by nature, is gluten free, but you never know what may be added in certain products.
TO MAKE DAIRY FREE: Use unsweetened almond milk in place of the milk in recipe. Use vegan butter in pan with peaches.
Some moments in life deserve a special celebration.
And every celebration deserves cake!
I made this decadent chocolate cake, adorned in pastel floral accents for Nana’s birthday.
Nana loves chocolate, and this cake was the perfect combination of rich chocolate and light, fluffy cake.
Pastel gel food coloring gives the piped rosettes their bright yet gentle hues. Using three different piping tips creates visual interest between each color. The sprinkles are Wilton brand, picked up at Michael’s Craft Store, and placed meticulously onto the buttercream with tweezers.
1cupbuttermilk (substitute: your preferred milk + 3/4 tsp cream of tartar)
3large eggs
1 ½cupfresh brewed espresso or strong coffee
¾cupvegetable oil
1tbvanilla extract
3cupall-purpose flour
2 ⅔cupgranulated sugar
½cupcocoa powder
1 ½tspbaking powder
1tbbaking soda
1tspkosher salt
Instructions
Preheat oven to 350° F.
Prepare three 8 inch cake pans. Grease the inside of each pan by evenly coating them with butter. Use a paper towel to wipe up any excess butter. Sift ¼ cup cocoa powder into a separate bowl. Sprinkle the sifted cocoa powder on the buttered surface, turning the pan upside down over parchment paper to tap out any excess. This process helps the cake release from the pan more easily.
If you are using buttermilk, skip this step. If not, mix your preferred milk (regular, oat or almond works) with ¾ teaspoon of cream of tartar. Whisk to combine and let set.
In a medium-bowl, combine the all-purpose flour, sugar, cocoa powder, baking powder, baking soda and salt. Whisk to combine.
In a separate large bowl, combine the sour cream, eggs, buttermilk (or buttermilk substitute prepared in Step 2), vegetable oil, vanilla extract and coffee/espresso. Make sure the coffee/espresso is cool to the touch before combining it with the rest of the dry ingredients.
Add the dry ingredients to the bowl with the wet ingredients. Using a hand mixer, combine the ingredients well for about one minute. Be mindful not to overmix.
Distribute the batter evenly between the three pans. Bake for 35-40 minutes at 350° F. Test doneness by inserting a toothpick in the center of the cake. If it comes out clean, the cake is done.
Rest the cakes for 10 minutes. Then turn the cakes out onto a wire rack to cook completely.
The cake was baked in three 8″ cake pans (as per recipe instruction) and filled with a Mascarpone Strawberry filling (as per my affinity for Italian cheeses). This recipe I adapted from a Real Simple Article.
Mascarpone Strawberry Filling
A light and well-balanced filling for the cake. Mascarpone balances out the sweetness of the cake's buttercream. Fresh strawberries work best!
½cupmascarpone cheese (I recommend Trader Joe's brand).
1 ½cuppowdered sugar.
½container of fresh strawberries
2-3tbgranulated sugar
½tspvanilla extract
pinch salt
Instructions
Pull the butter and cream cheese out of the fridge. Let it sit out on the counter while you prep the strawberries.
Remove the strawberry stems and cut into quarters. I used about a half container of strawberries. ~Leftovers are great to eat by themselves so no worries if you cut too many!~
Sprinkle 2-3 tablespoons of granulated sugar over the strawberries and toss to coat. Let sit for 7-10 minutes until juices are coming out and the strawberries are softened. This process is called macerating — using sugar to break down the fruit.
Mash strawberries with the back of a fork. You don’t want any big chunks but some small ones are okay. Set aside.
In a stand mixer, or using a hand mixer and large bowl, whip butter and cream cheese until fluffy.
Switch to low speed, add powdered sugar, mascarpone, vanilla and a pinch of salt. Measure out 2 tablespoons of the macerated strawberries and add to mixture. Mix until just combined.
1 ½cupunsalted butter (3 standard sticks), softened to room temp.
¼cupheavy whipping cream
¼tspsalt
½tspvanilla extract
Instructions
Beat butter until soft and fluffy.
Incorporate powdered sugar 1/2 cup at a time, waiting until combined before adding more.
Once all powdered sugar is mixed into butter, add salt and vanilla extract.
Add the whipping cream in a slow steady stream with the mixer still on.
Notes
When making buttercream, it is imperative to scrape the sides of the mixer consistently, as this helps to incorporate everything evenly. Particularly if you have a mixer like mine, with a deep bowl, it is important to scrape the bottom to make sure everything is mixed in evenly.
Keyword buttercream
The Decor
Cake Assembly
As far as timing goes, I baked the cake on Saturday, trimmed it and filled it with the Mascarpone filling. Then I added a crumb coat to seal in the freshness of the cake and to give myself a smooth base for decorating.
The cake stayed in the fridge until Sunday morning, after making a second batch of buttercream (just in case) and preparing my colors. I decorated on Sunday and left in the fridge until the party Sunday night.
This kept extremely well in the fridge and the buttercream holds up after sitting on the counter for a few hours. I removed the cake from the fridge about 15 minutes before serving.
For all those roses…
To decorate, I used the watercolor technique around the entire cake; created by adding splotches of colored frosting and smoothing out against the white frosting. This served as my background for the piped rosettes. I began with the largest rosettes first, then filled in with smaller.
For the top of the cake, it’s important to divide the large rosettes evenly before filling in with smaller piping. Pipe the rosettes as if you are cutting the cake in half each time, instead of attempting to go in a circle. Pipe one rosette, then turn the cake around and pipe the next on the opposite side of the cake. Pipe the next in between these two rosettes, and continue until all are piped.
For a visual tutorial, check out this video by Wilton.
It’s an extremely fun technique that requires one hand motion. Practice on a sheet of parchment before decorating your cake! Once you feel comfortable with the rosette piping motion, start decorating your cake.
Piping for practice on parchment (say that three times fast) is also a great way to see how your piping tips look before using them on the cake.
The techniques used to create this cake were completely doable and I truly enjoyed putting it together. It takes patience and time, but it can be done!
* * * * * * * *
THE BIRTHDAY GIRL
On a Personal Note
Technique aside, what truly makes a cake like this worth a weekend of work is the people with whom you share it.
That look in their eye when you walk into a room holding a cake like this is simply priceless! That sheer excitement is the most magical part of food, when you bring a smile to the people who partake. That moment, that joy, is really what it’s all about. To be quite cheesy, those moments truly show that yes, food is an act of love.
For me it was a privilege to bring that moment to Nana, and to share this delicious dessert with my family.